Your product images are an integral part of your WooCommerce website. They serve as visual aids to showcase your products, draw attention, and entice potential customers. But if your images aren’t optimized, they can slow down your website’s loading speed, causing user frustration and potentially losing sales.
A study by Portent found that the highest e-commerce conversion rates occur between 1 and 2 seconds, with an average of 3.05% e-commerce conversion rate at 1 second, while the conversion rate declines as the load time increases. Another study by Google shows the probability of a customer bouncing from your site increases 32% as page load time goes from 1 second to 3 seconds.
These statistics highlight how important it is to keep your images optimized for speed. So today, we’ll walk through our tips for optimizing your WooCommerce images for maximum performance.
1. Choose the proper image format:
- JPEGs are commonly used to balance file size and image quality for product images. Your product and most site images should be primarily in JPG format.
- PNGs are best for transparent images but are more significant in file size, so you should avoid them when possible.
- SVG images are perfect for vector content and offer smaller file sizes than JPEGs and PNGs. Your logos, icons, and illustrator content should be in SVG format.
- Consider using modern image formats like AVIF and WebP, which provide superior image quality with smaller file sizes to take it up a notch.
2. Set image dimensions restrictions: Large images take longer to load, so limiting the image dimensions to the space they will occupy is crucial. For example, using a 1000×1000 pixel image in a 100×100 pixel space is unnecessary and will slow down your website.
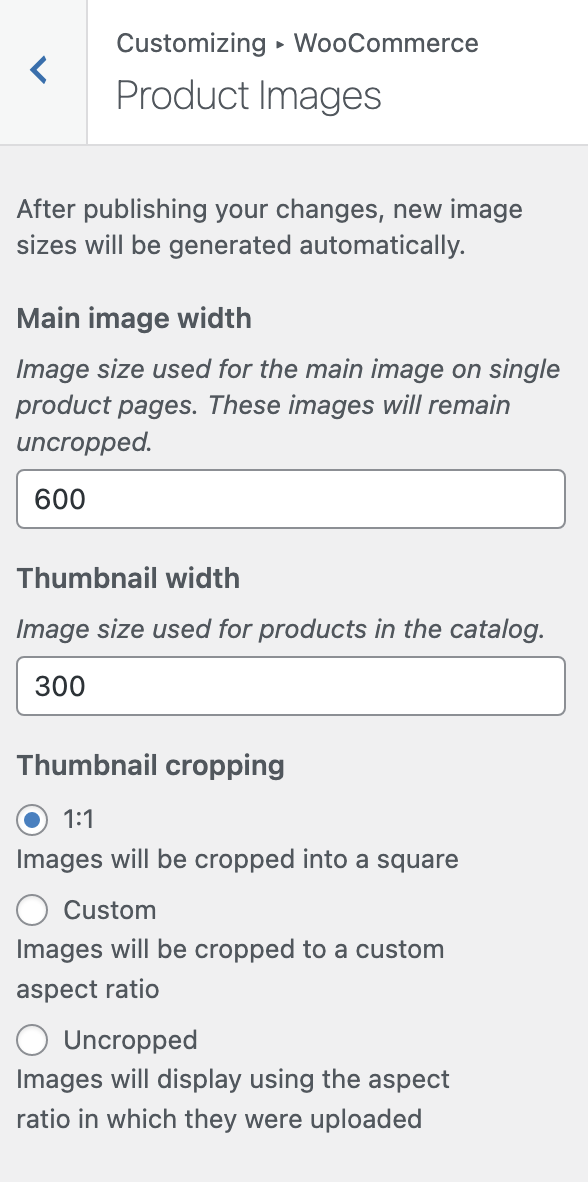
You can check or set your theme’s set product dimensions by visiting Appearance > Customize > WooCommerce > Product Images. You’ll see the following options:

- Main image width – Image size used for the main image on single product pages. These images will remain uncropped.
- Thumbnail width – Image size used for products in the catalog.
- Thumbnail cropping
- 1:1 – Images will be cropped into a square
- Custom – Images will be cropped to a custom aspect ratio
- Uncropped – Images will display using the aspect ratio in which they were uploaded
We recommend using a maximum image dimension of 1800×1800 pixels for all other site images.
3. File size matters: Images with large file sizes take longer to load, affecting your website’s loading speed. You can mitigate this by compressing your images before uploading them. Tools like TinyPNG compress images without compromising quality, speeding up the load times. Aim to keep your product images to around 70 KB – 140 KB.
4. Use an image optimization plugin: To optimize your images further, we recommend using an automated image optimization service & plugin like Imagify. This plugin has features like bulk optimization, automatic resizing, and optimization on upload. By automating the optimization process, you can save time and ensure that all your images are optimized for performance.
Additional image tips & best practices
In addition to these best practices, there are a few other things to keep in mind when optimizing your images:
1. Maintain consistency: Ensure that product image dimensions are consistent in shape to look uniform in your shop catalog. This consistency helps create a professional and polished appearance that helps build trust with potential customers.
2. Use alt text: WordPress allows you to add alt text after uploading images. Alt text is a description of an image that is displayed if the image cannot be loaded for any reason. Alt text helps visually impaired users understand the content of the image, and it also helps search engines understand the image’s content. Ensure that you include descriptive and relevant alt text for all your images.

3. Keep image file names descriptive: Use descriptive file names for your images instead of generic ones like “image1.jpg” or “photo.jpg.” A descriptive file name helps search engines understand the image’s content and can improve your website’s search engine visibility.
4. Use image sitemaps: An image sitemap is a file that lists all the images on your website. Submitting an image sitemap to search engines like Google can help them understand the content of your images and improve your website’s search engine visibility. Yoast and Rankmath are two popular SEO plugins that automatically generate an image sitemap for you.
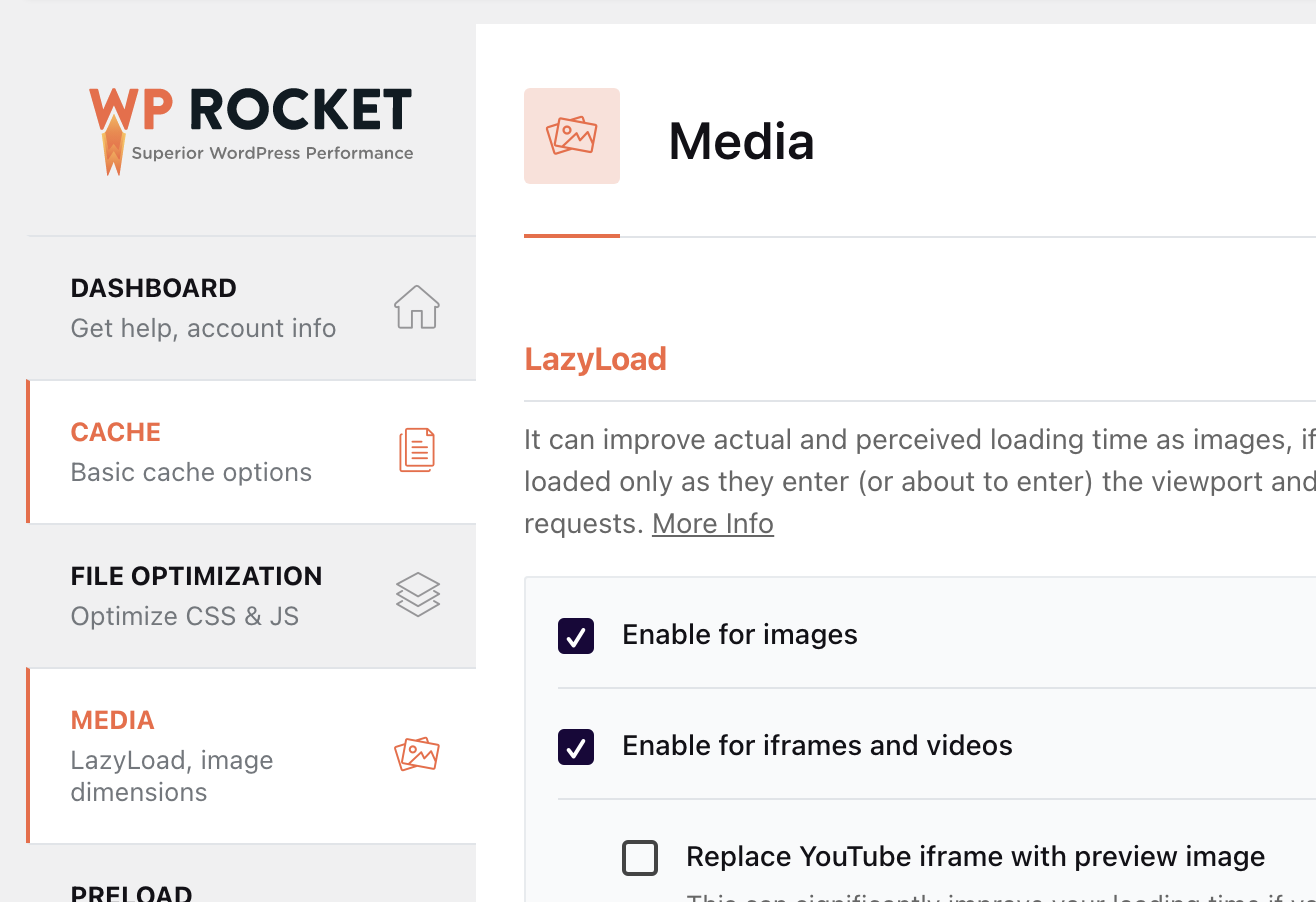
5. Implement Lazy Loading: Delay the loading of images until needed using a lazy loading technique. This technique helps reduce the initial page load time, improving website performance. Use a plugin like WP Rocket to implement lazy loading on your website.

In conclusion, optimizing your images for your WooCommerce site is essential for improving its performance, user experience, and search engine visibility. Remember to monitor your website’s loading speed regularly and take steps to improve it as needed.
By implementing these best practices and paying attention to the additional details, you can significantly improve your website’s speed, user experience, and search engine visibility. In addition, a fast and user-friendly WooCommerce site will attract and retain more customers, helping you grow your business in the long run.
